Ice Shanty Setup Guide — From Portable Pop-Up to Permanent Shack
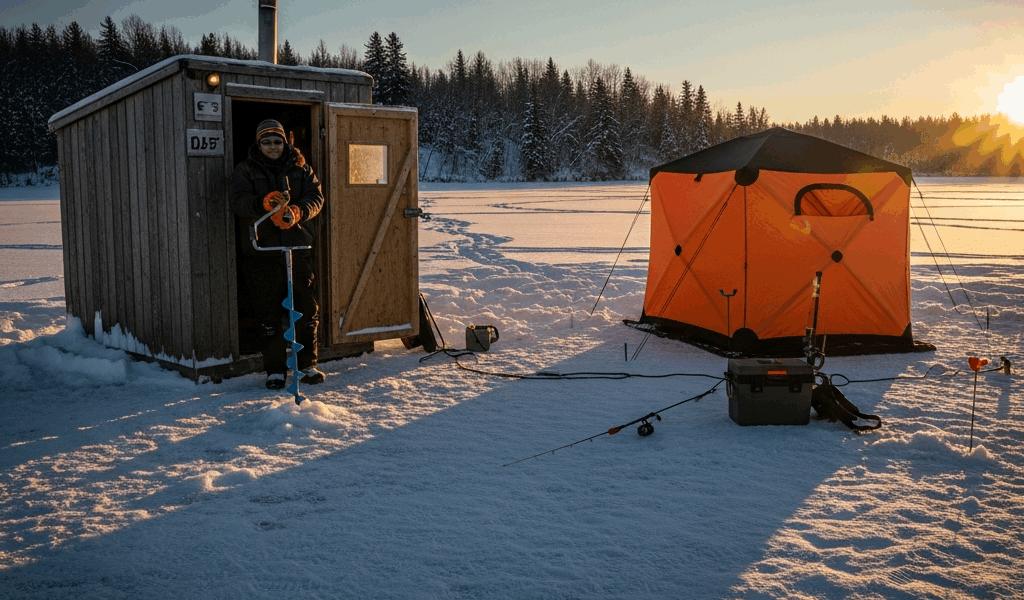
Ice shanty setup has gotten complicated with all the conflicting advice flying around. So let me cut through it with one honest truth upfront: the shelter you pick — and how you actually set it up — matters more than almost any other call you’ll make out on the ice. I’ve drilled holes in 14-degree wind chills armed with nothing but a balaclava and misplaced optimism. I’ve also sat inside a fully heated permanent shack nursing bad coffee while watching a tip-up flag snap to attention sixty yards out. Both count as ice fishing. Only one stays enjoyable past the forty-five minute mark. Whether you’re running a pop-up hub shelter for a quick morning perch session or anchoring a permanent shack through February, setup technique is what separates a functional day from a miserable one. Real steps, not vague advice.
This article includes affiliate links. We may earn a commission at no extra cost to you.
Pop-Up Hub Shelters — Best for Run-and-Gun Fishing
Hub shelters are the most popular choice out there, and the reason isn’t complicated. Models like the Eskimo QuickFish 3i or the Clam Kenai 3TC run somewhere between $180 and $350 — and a competent person can get them fully deployed in under sixty seconds. I actually timed myself once. Fifty-four seconds, including staking two corners. That’s the whole pitch right there.
Setup in Under 60 Seconds
But what is a hub shelter, really? In essence, it’s a tension-based pop-up system built around a central hub that locks the poles outward when pressure is applied. But it’s much more than that — the engineering is what makes fast deployment possible without any assembly. Lay the bag flat on the ice. Unzip it. Pull the shelter out, grab the center hub with both hands, then push outward and upward in one clean motion. Poles snap into position on their own. Walk each corner and press the foot peg down. Done. The trick most people miss — and I missed it my first three times — is making sure the shelter is fully unrolled before you pop it. A twisted wall panel during setup stresses the pole junctions and eventually cracks them. Ask me how I know.
Wind Positioning
Orient the door away from the prevailing wind. Sounds obvious. Plenty of people ignore it anyway and then spend the afternoon wondering why their door keeps blowing open mid-unhook. On most Midwestern lakes, January and February wind comes out of the northwest. Set up with the door facing southeast or east. If you’re not sure about wind direction, look at the loose snow sitting on the ice surface — it drifts toward wherever the wind is pushing it. Free compass, basically.
Anchoring on Ice
The stakes that ship with most hub shelters are garbage. Don’t make my mistake of trusting them for a full season. Factory auger-style stakes on a QuickFish are maybe six inches long and strip out in soft ice by noon. Swap them immediately for 10-inch ice anchors — the Eskimo 8-inch stake set runs about $18 and earns every penny. Drill a pilot hole at a 45-degree angle outward from the shelter corner, thread the anchor in, clip the hook to the corner grommet. Four corners, four anchors. In truly hard ice or late-season rotten ice, a rubber mallet helps seat them properly without shredding your palm.
Flip-Over Shelters — Best for Solo or Two-Person
Flip-over shelters — sometimes called sled shelters — have a rigid or semi-rigid sled base with a fabric shell built directly into it. The Otter XT Lodge and the Frabill Fortress are the two names that keep surfacing in serious ice fishing conversations. Expect to pay $300 to $700 depending on size and insulation rating.
How They Work on the Ice
You haul the sled out, position it over your intended holes, then flip the shell backward off the sled — it snaps into a U-shaped frame that drops around you. The sled itself becomes your floor and seat platform. Setup time is honestly slower than a hub shelter, closer to two or three minutes, but the structural advantage makes up for it. The rigid sled base doesn’t flex in wind. No billowing fabric floor. The whole unit sits low-profile — and that matters significantly when you’ve got sustained 25 mph gusts pushing across a flat lake with nothing to stop them.
Positioning Your Flip-Over
Because the sled is your floor, you need to position it before drilling. Mark your intended hole locations with a skimmer or just your boot, then set the sled so those spots land inside the sled’s cutouts or open floor zones. Most flip-overs have one or two pre-cut holes in the sled floor — drill through those. Drilling first and then trying to position the sled over existing holes is harder than it sounds, especially when an 8-inch auger hole ends up a few inches off center from the cutout.
Wind Advantages
Low, heavy, rigid — flip shelters sit close to the ice surface and handle wind loads noticeably better than hub shelters in the same conditions. That’s what makes flip-overs endearing to us solo anglers. The tradeoff is interior space. Two adults and their gear in a flip-over is cozy in the polite way people say cozy when they mean cramped. Solo or with one other person, genuinely comfortable. Group of three or more — bring a hub.
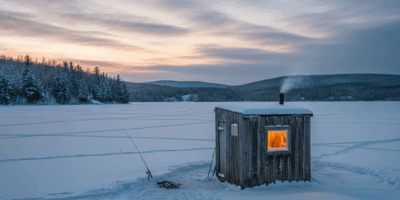
Permanent Shacks — Seasonal Setup
Probably should have opened with this section, honestly. If you’re the type who commits hard to one lake for an entire season, permanent shack setup is its own discipline entirely. These are typically plywood-and-framing structures on sled skids — ranging from 8×8 feet up to 8×16 or larger. Some people build them over a weekend with basic lumber and hardware store hardware. Some people grab used ones for $500 to $2,000 off Facebook Marketplace and clean them up. Either way, placement logistics and legal compliance aren’t negotiable.
When to Move Out and When to Move Back
Every state with a real ice fishing culture has hard deadline regulations for permanent shack removal. Minnesota requires shelters off the ice by the last Sunday in February in most zones. Wisconsin mandates removal within 30 days of ice-out, though the specific date shifts by county. Michigan uses fixed dates that vary by region. Check your state DNR site every single season — these dates do change, and ignorance doesn’t protect you. I’ve watched people leave shacks out too long and seen them go through the ice during an early thaw. Environmental violation, salvage nightmare, expensive mistake — all three at once.
For placement, get out early December when ice thickness hits a solid 8 to 10 inches. Use a chisel bar to check thickness every 150 feet as you walk out — don’t trust one test spot for a hundred-yard stretch. Establish your shack on a point, drop, or flat that consistently holds fish through January. Once it’s set, it anchors your whole operation. Run tip-ups and rod-and-reel setups off it while others are still drilling scattered holes and packing up cold.
Comfort Upgrades
Permanent shacks justify real investment — that’s just the reality. Interior LED strip lighting powered by a 12V battery or a small generator changes the atmosphere in ways that are hard to explain until you’ve experienced it. A folding table, a few bucket stools, a foam floor pad over bare wood — those are standard. Some setups include a cot for early arrivals who want to grab an hour between bites. A propane wall heater like the Mr. Heater 30,000 BTU, mounted high on the wall, heats an 8×8 space adequately through most of what winter throws at it.
Heating Your Shelter Safely
This section isn’t optional reading — I want to be direct about that. Carbon monoxide kills people in ice shanties every season. It is not rare. It is not a freak occurrence. It’s a consistent, documented hazard that is entirely and straightforwardly preventable.
Propane Heaters — What to Use
The Mr. Heater Portable Buddy (MH9BX, around $90) is the standard choice for portable shelters. It has an oxygen depletion sensor that shuts the unit off when O2 levels drop — this isn’t a luxury feature, it’s a baseline safety requirement. For larger permanent shacks, the Big Maxx 30,000 BTU or Mr. Heater’s 30K wall-mount unit are appropriate. Run propane only. No charcoal. No wood-burning stoves in enclosed fabric shelters. No kerosene heaters in tight spaces. Full stop.
CO Detectors — Mandatory, Not Optional
Burned by a false sense of security early in my fishing life, I now keep a Kidde Nighthawk CO detector — roughly $35 at Home Depot — clipped to my gear bag on every single trip. In a permanent shack, mount one at seated height. CO accumulates unevenly, and a detector near the ceiling may not alarm before you’re already feeling symptoms down where you’re actually sitting. Battery check every trip out. Replace the unit annually.
Ventilation Requirements
Every propane heater needs combustion air — this isn’t optional physics. In a hub shelter, crack the door two inches on the downwind side. In a permanent shack, install a passive vent: a 3-inch diameter vent tube near the floor on one wall, capped with a screen to block wind-driven snow. Without fresh air intake, even an oxygen-sensor-equipped heater will cycle off repeatedly and never maintain temperature. That’s annoying at best, dangerous if it pushes you to override the safety shutoff.
Essential Shanty Gear Beyond Shelter
The shelter keeps the wind off you. The gear makes the day worth the drive out. Here’s what I actually run, with real specifics.
The Basics That Aren’t Obvious
- Five-gallon bucket with seat lid — The Plano Guide Series seat lid ($15) turns any hardware store bucket into a stool and storage unit simultaneously. Carry your smaller gear out in it, then sit on it. Simple.
- Rod holders — The Frabill Rod Holder ($12–$18 each) clamps to most shelter poles or drills into sled walls. Holding a rod for six straight hours is exhausting. Holders let you monitor multiple lines without becoming a statue.
- LED headlamp with red-light mode — The Black Diamond Spot 400 ($40) has a red mode that preserves night vision and doesn’t spook fish during low-light windows at dawn or dusk.
- Skimmer — A 6-inch slotted skimmer clears ice slush from your holes throughout the day. The plastic-handled ones crack in serious cold. Get an aluminum-handled version from Frabill or Nils Master.
- Ice scoop or ladle — Separate from the skimmer. Used specifically for clearing ice chunks after drilling, especially noticeable with a 10-inch auger.
- Foam floor pad — A 24×48-inch closed-cell foam kneeling pad ($8 at any farm supply store) goes under your feet inside a hub shelter. Ice conducts cold upward through your boots faster than the ambient air does — this is an underrated purchase.
- Power bank, 20,000 mAh minimum — Anker PowerCore 20100 ($45) keeps your phone, fish finder, and flasher charged through a full day without drama.
Auger Maintenance on the Ice
A dull auger blade in hard January ice is a full-body workout and fifteen wasted minutes per hole. Keep a blade cover on during transport — always. Replace blades every season or after roughly 200 holes, whichever comes first. Ion and StrikeMaster both make replacement blade sets for most electric and hand augers, $25 to $45. Sharp blades drill an 8-inch hole through 6 inches of hard ice in about eight seconds. Dull ones take a minute and leave a ragged edge that catches your line on every drop.
Lighting Inside the Shelter
Fishing line, small hooks, and cold fingers in the dark — that combination goes wrong fast. A string of USB-powered LED strip lights along the ceiling of a hub shelter ($12 on Amazon, 9.8 feet per strip) provides enough ambient light to tie knots, read your flasher screen, and unhook fish without killing your low-light sensitivity. Go warm white, 2700K color temperature. Bright white is harsh and pointless in a small shelter — it’s not a surgical suite out there.
Setup done right means your time actually goes toward fishing instead of fighting your own gear. The ice season in most states runs ten to twelve weeks — that’s it. Every hour spent wrestling a poorly staked shelter or digging through a disorganized bucket is an hour you spent not watching your line. Get the setup dialed in once, keep it consistent, and the rest of the day pretty much handles itself.
For a reliable all-season rod, the Ugly Stik GX2 Combo handles ice fishing and open water equally well.


Stay in the loop
Get the latest freshwater fishing spots updates delivered to your inbox.